PRICE BEAT GUARANTEE! - T&C's Apply
To achieve the required height of each sleeper on the bottom row, (if raising the sleeper is necessary) place the first sleeper down between the steel posts and use packers (window packers or similar non-perishable) to stack underneath the sleeper where it sits up against the steel posts, which will help you to achieve the exact level required. Confirm level with spirit level.
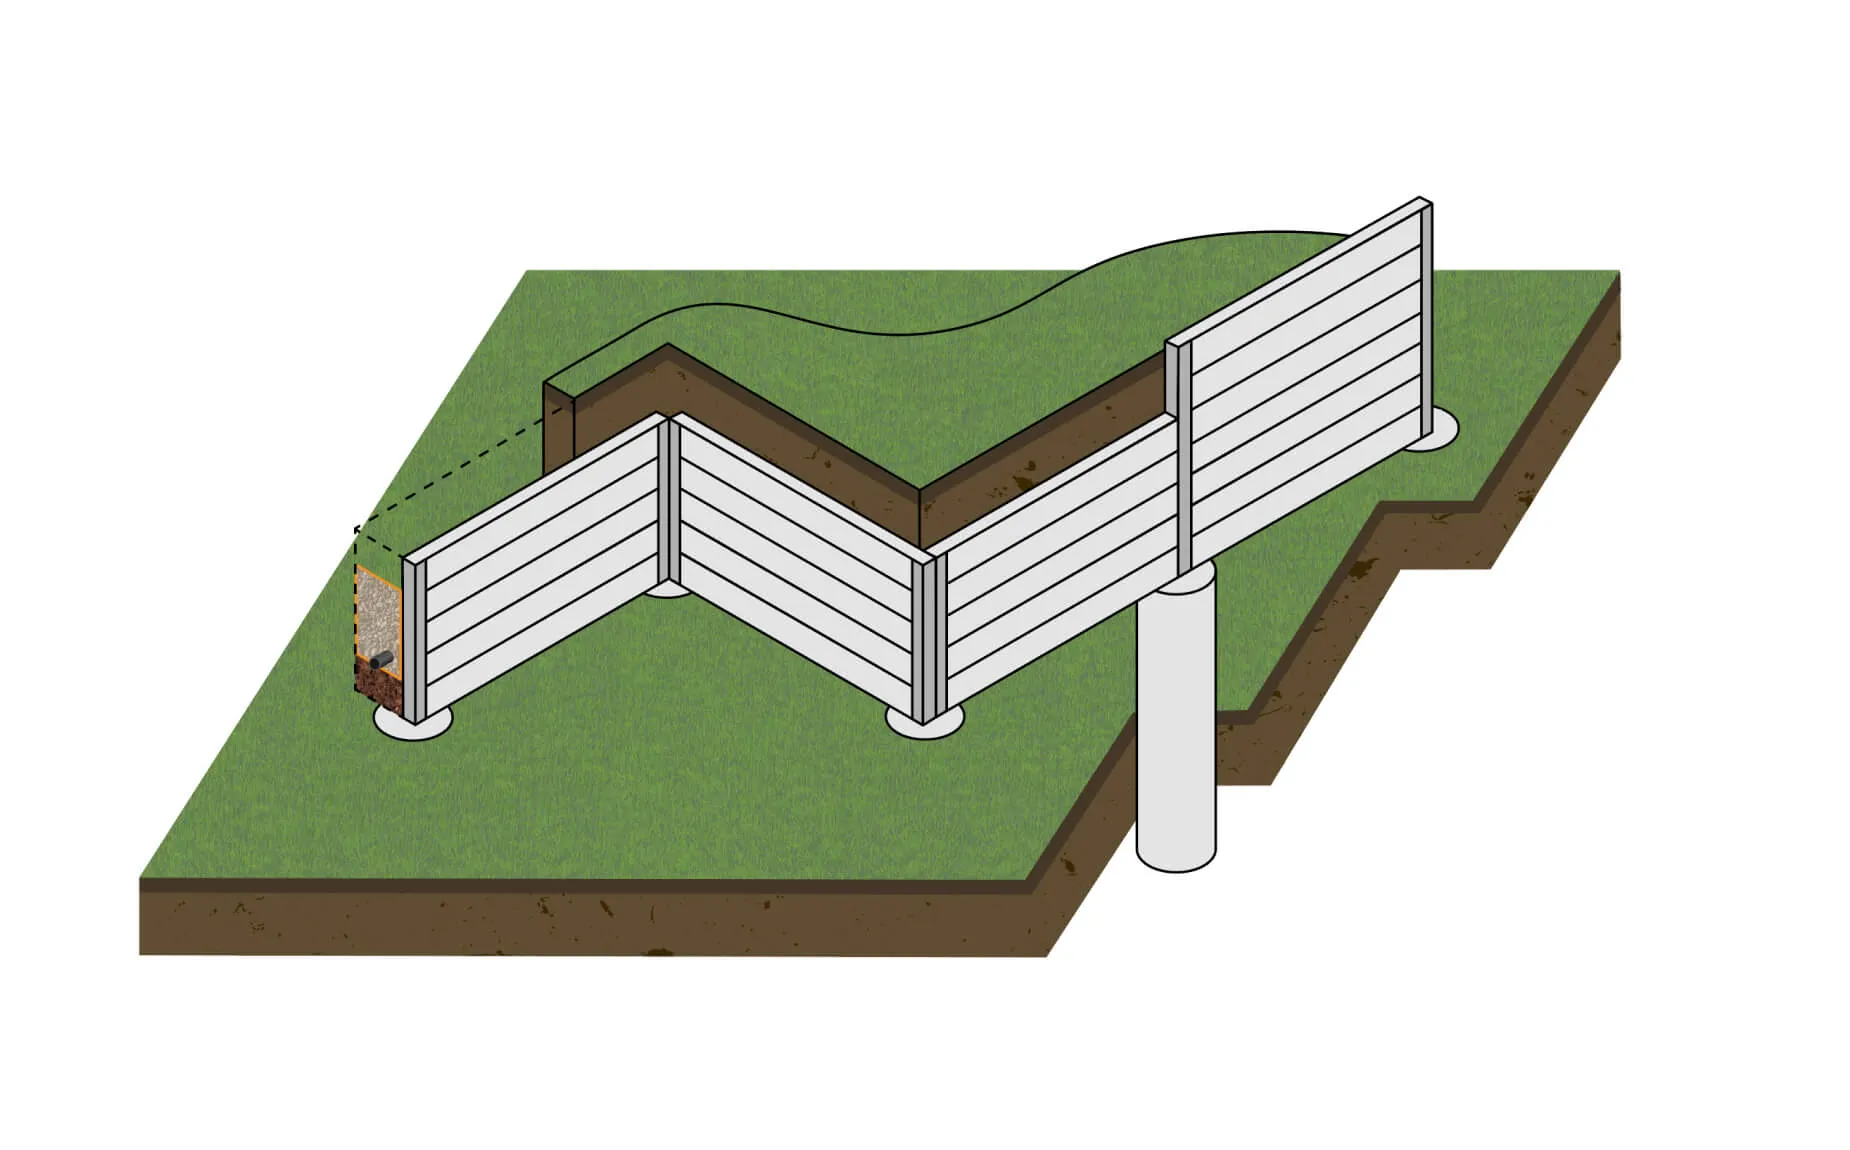
We recommend using wedges (we sell plastic ones however you can use pieces of wood cut into wedge shapes also) to be hammered in behind each sleeper (as indicated in the magnified image in the diagram on the previous guide page). These are wedged in between the sleeper and flange of the steel post, which pushes the sleeper flush up against the steel post front facing flange.
Once the first sleeper is in place – level and chocked forward – you can start to install the remaining sleepers, using the spirit level throughout the process of installing each sleeper to ensure the wall remains level by the time all the sleepers have been placed in.
Any sleepers and steel posts that are cut need to have the exposed ends sprayed with galvanising spray/bitumastic paint or the like to minimise any risk of rust.